
Introduction
Rehook is an API-first promotion engine designed to help organizations build customer loyalty and engagement. Our powerful REST-based API and intuitive web dashboard enable you to create and oversee promotional campaigns easily.
Rehook product suit offers following solutions:
- Campaigns - Referral, Loyalty, Distribution, Leaderboards
- Wallets
- User segmentation
- Integration with customer analytics platform (mixpanel, segment, clvertap, webengage etc..)
- Coupons
To know more about rehook product suit, please visit Rehook website
A step-by-step guide is given below to getting started with Rehook
Step 1: Create an Application (mandatory)
Every application is a project on the Rehook dashboard that can be used for your specific platform, region, or as required. for example: If you have operations running in the different countries and you want to create different application for each country, then, two application can be created as 'Rehook_India' and 'Rehook_London'.
To create an application
- Click on + Add New CTA in the My Applications drop-down found on the top left of the corner of the dashboard.
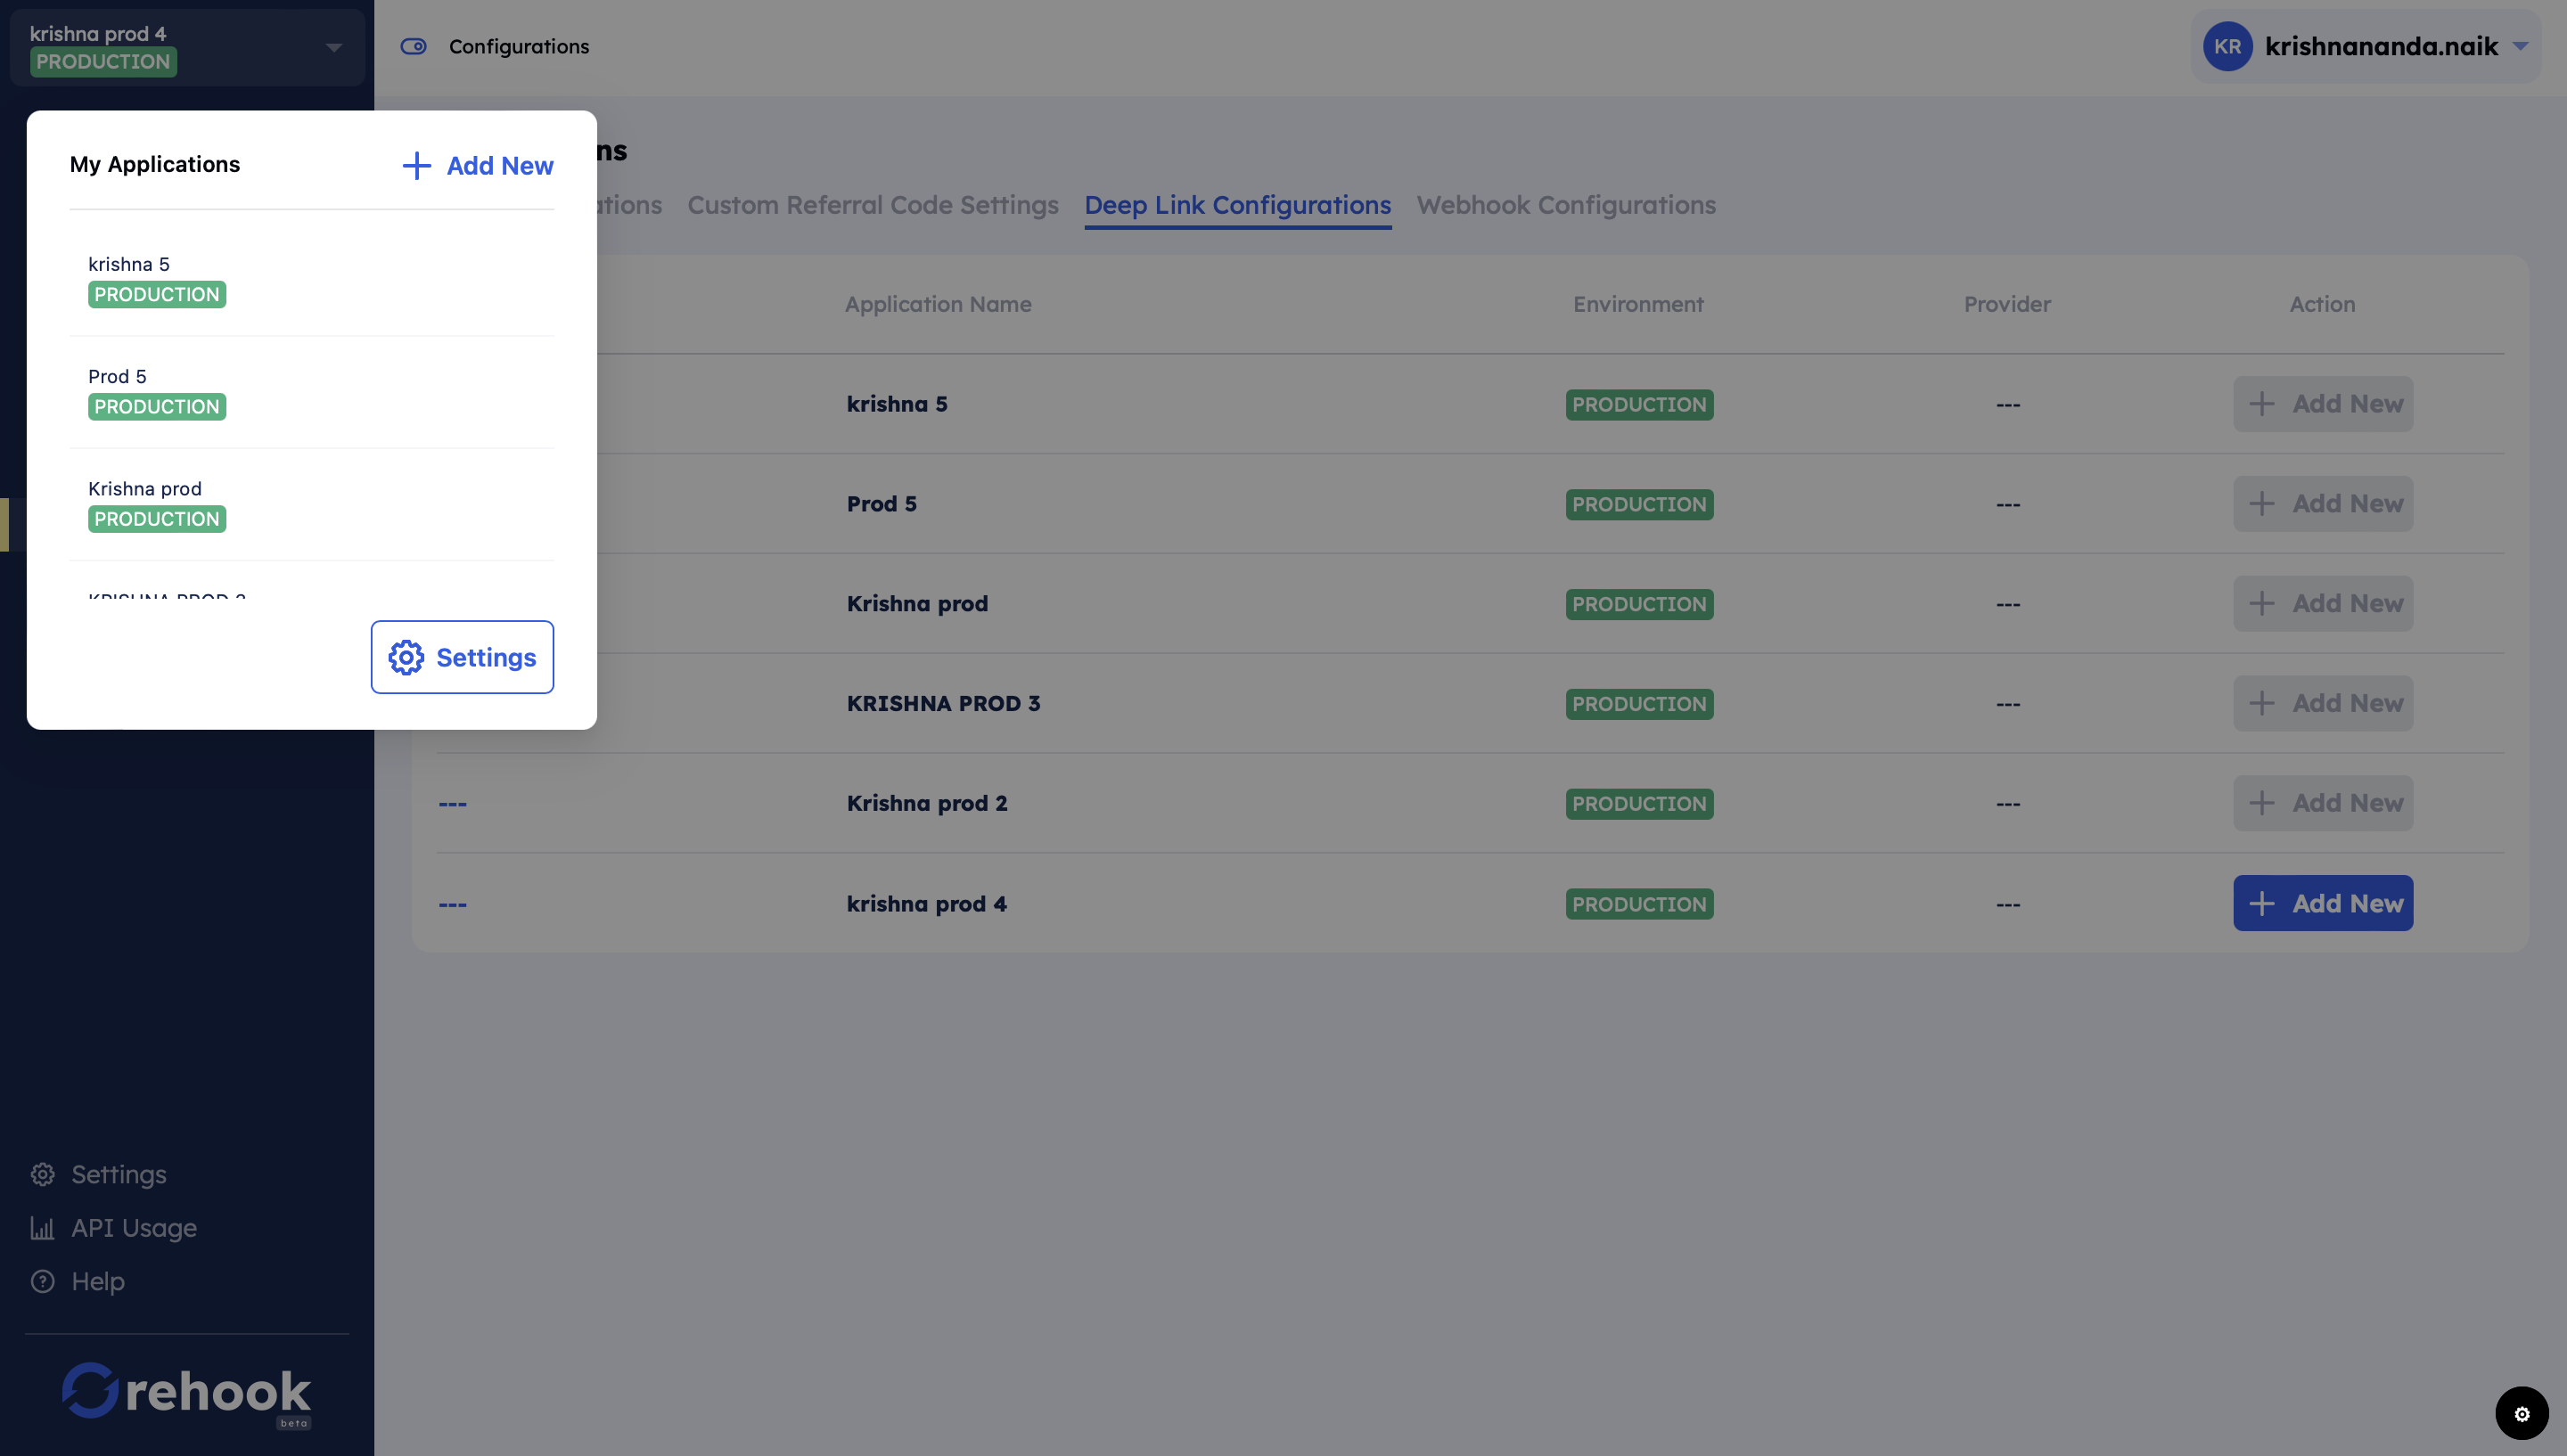
My application drop-down
- System will open 'create application' modal.
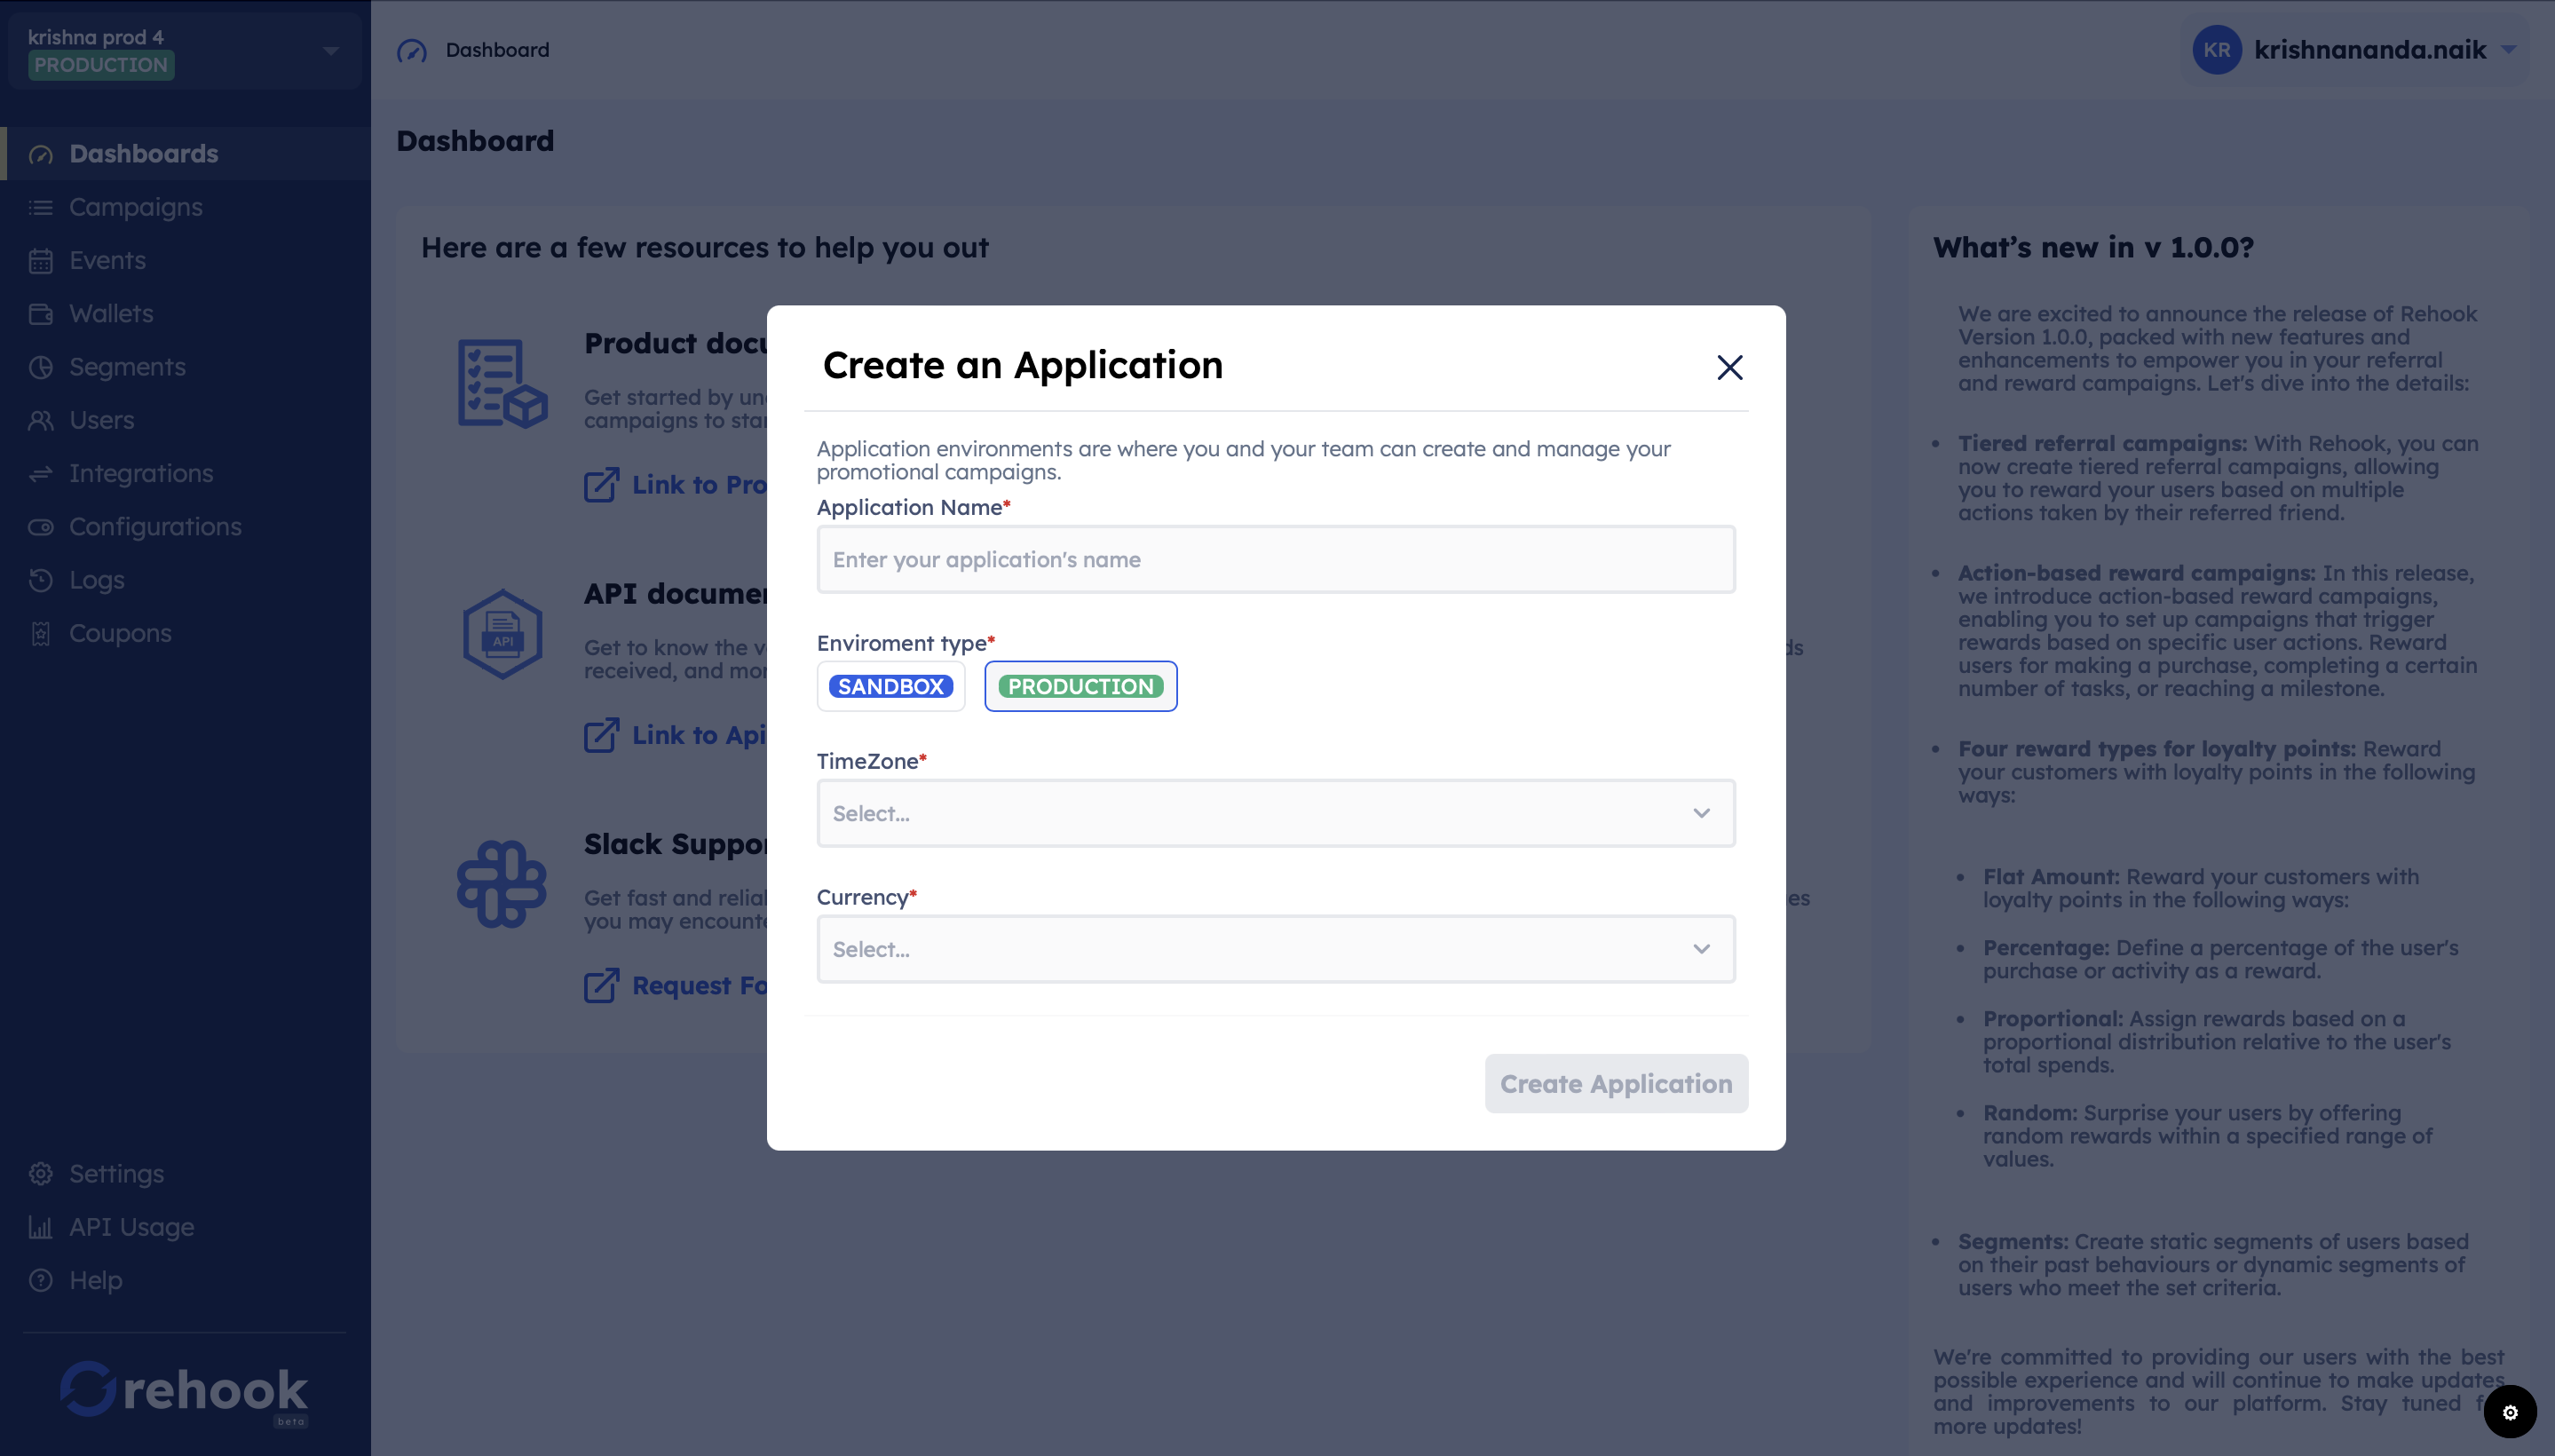
Create application modal
Enter the following details to create an application
- Application Name : enter the name of your application (example: Rehook_India)
- Environment Type : Choose the environment of the application type between Sandbox & Production
- Timezone : select the timezone of your application. This cannot be changed once set. All time-related features will operate as per the application timezone.
- Currency: select the currency for the application.
- Click Create Application once all the details are filled.
Step 2: Getting API Key and Secret Key
- Once you've created an application, you will receive the API key and Secret key. These will be used in the next step to send user data from your platform to Rehook via API's
- Each application will have it's own API key and Secret key.
- To get API credentials for any application. please click on 'Setting' module found on left bottom corner of the dashboard.
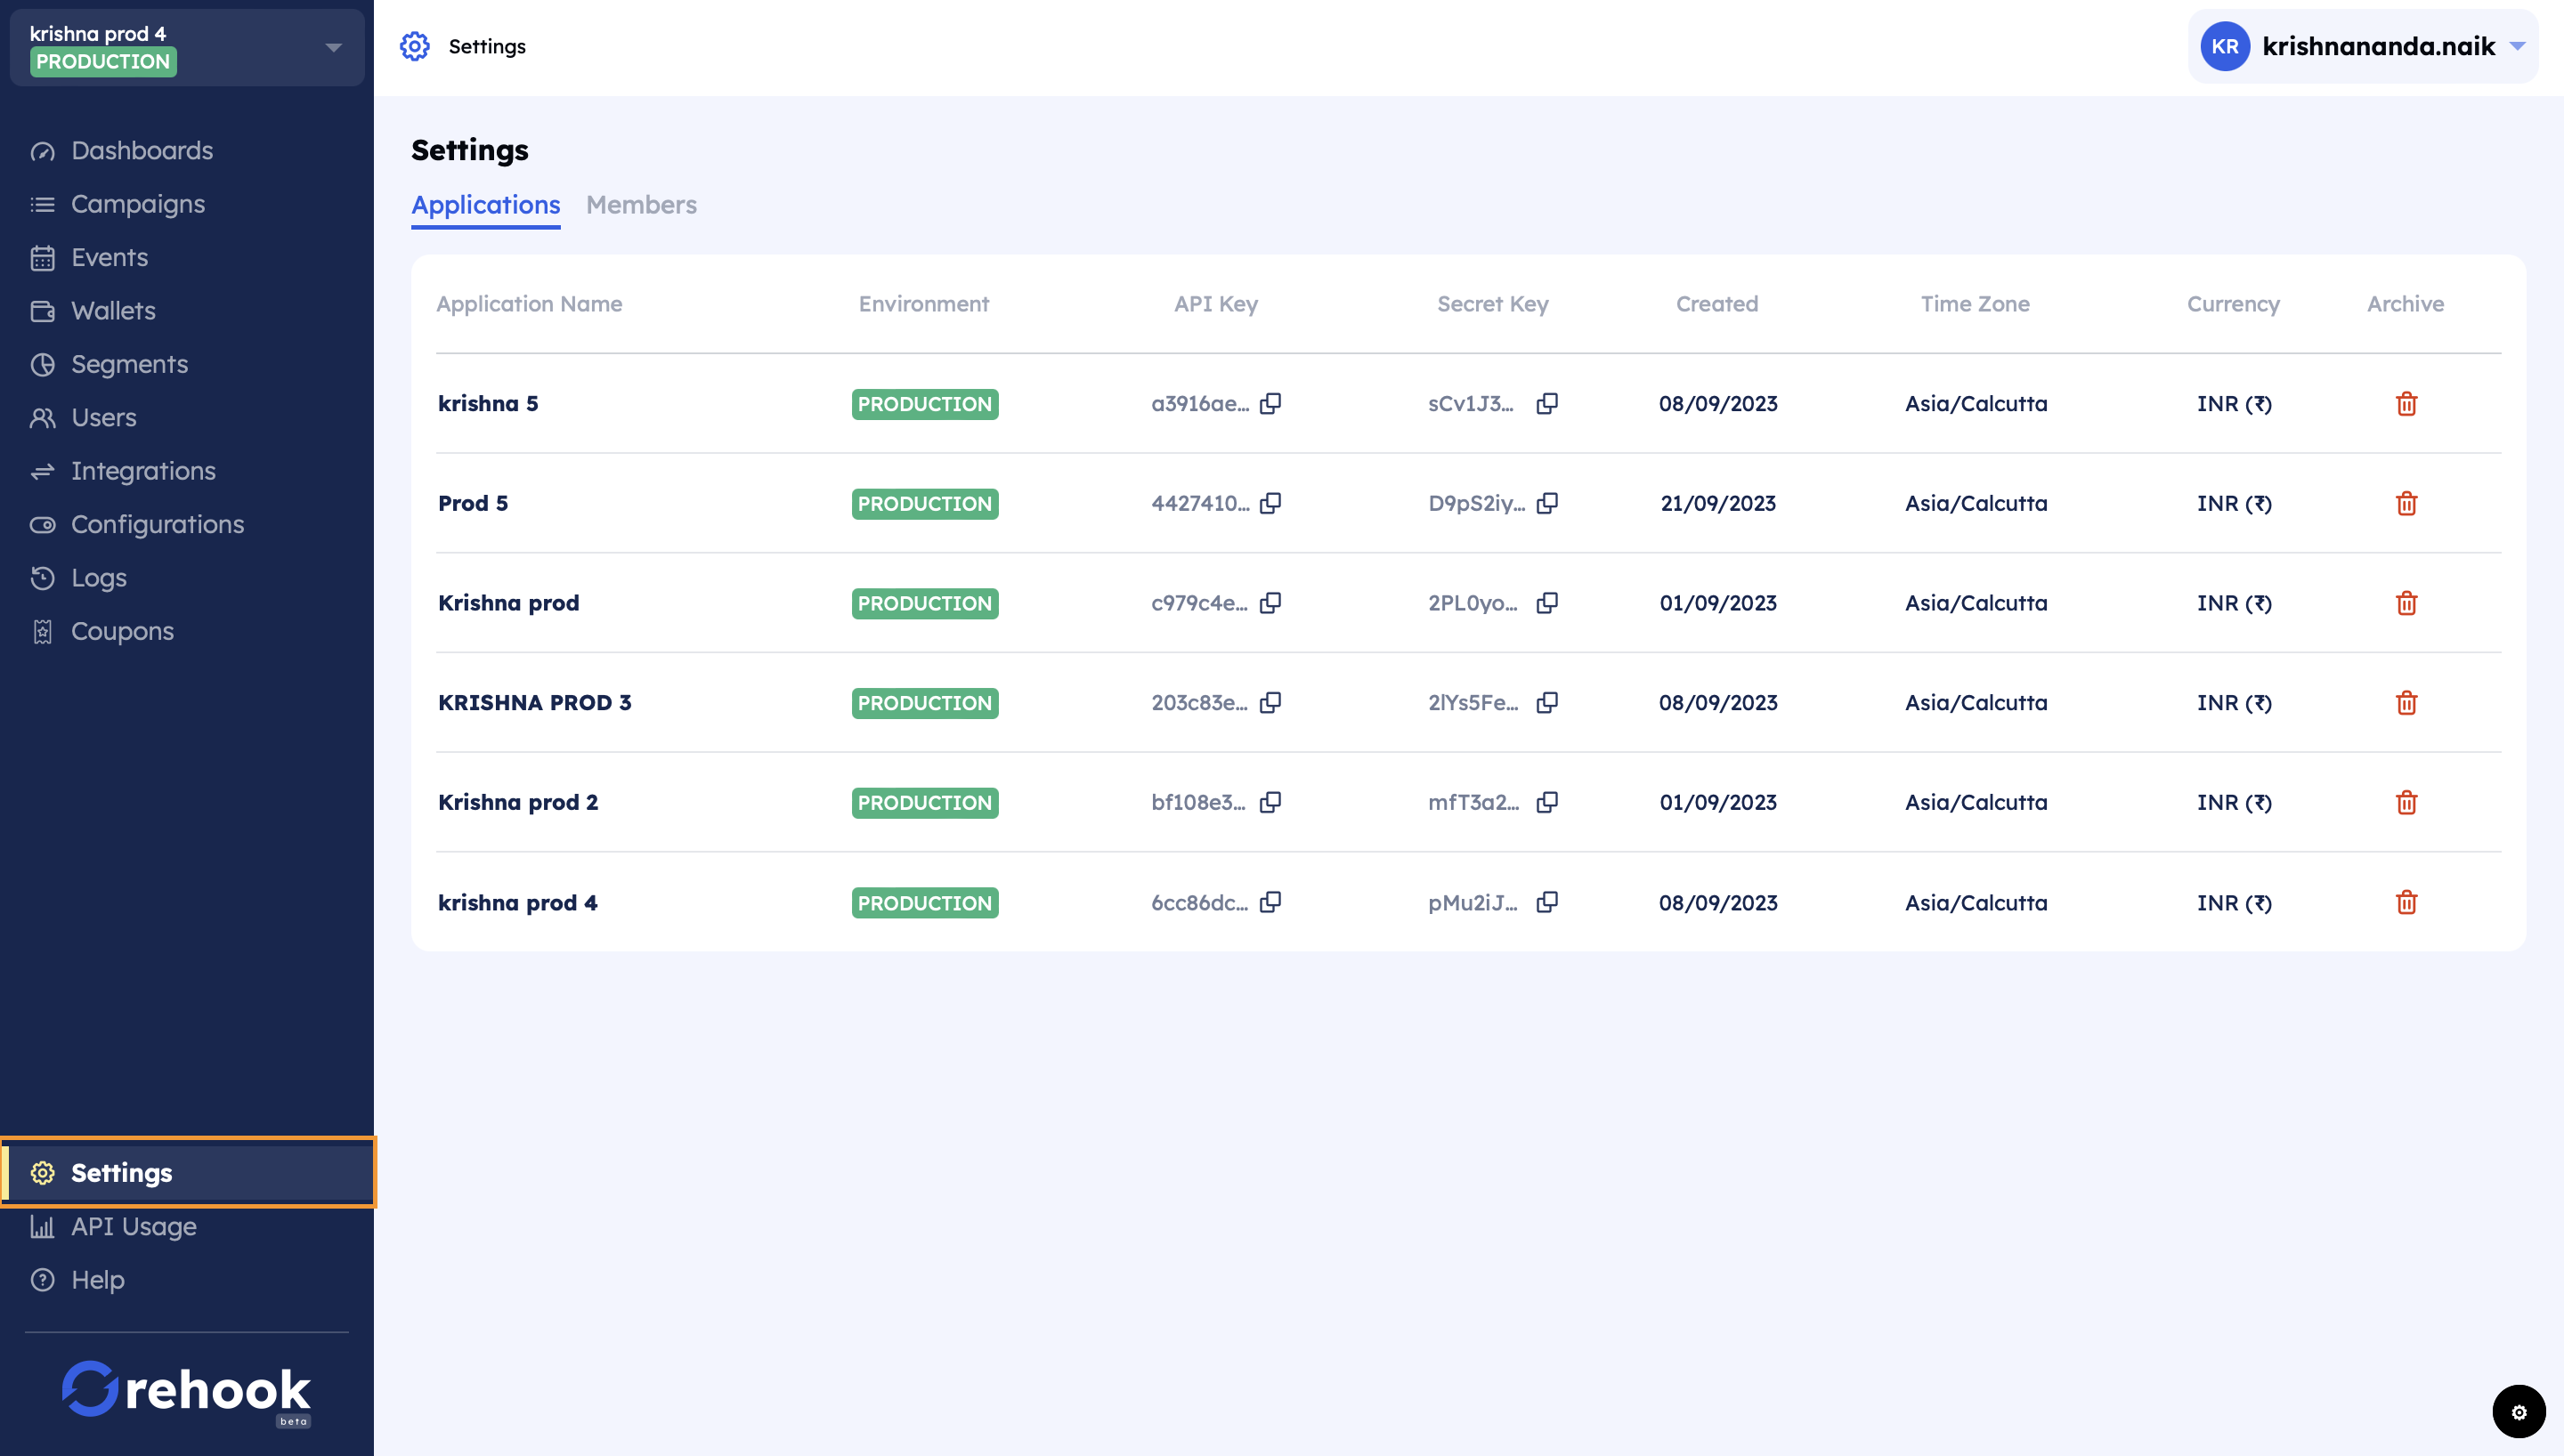
Applications tab
Step 3: Mandatory configurations.
You have to complete the mandatory prerequisite configurations to start with campaign creation:
Custom referral code settings
You can configure the custom referral code for referral campaign. Custom Code helps you can set the format of the referral code to make it unique to your application.
A step-by-step guide is given below to configure the custom referral code
- Click on Configurations module found on left panel of admin dashboard.
- Go to 'Custom Referral Code Settings' tab.
- Fill the following details to generate the custom referral codes.
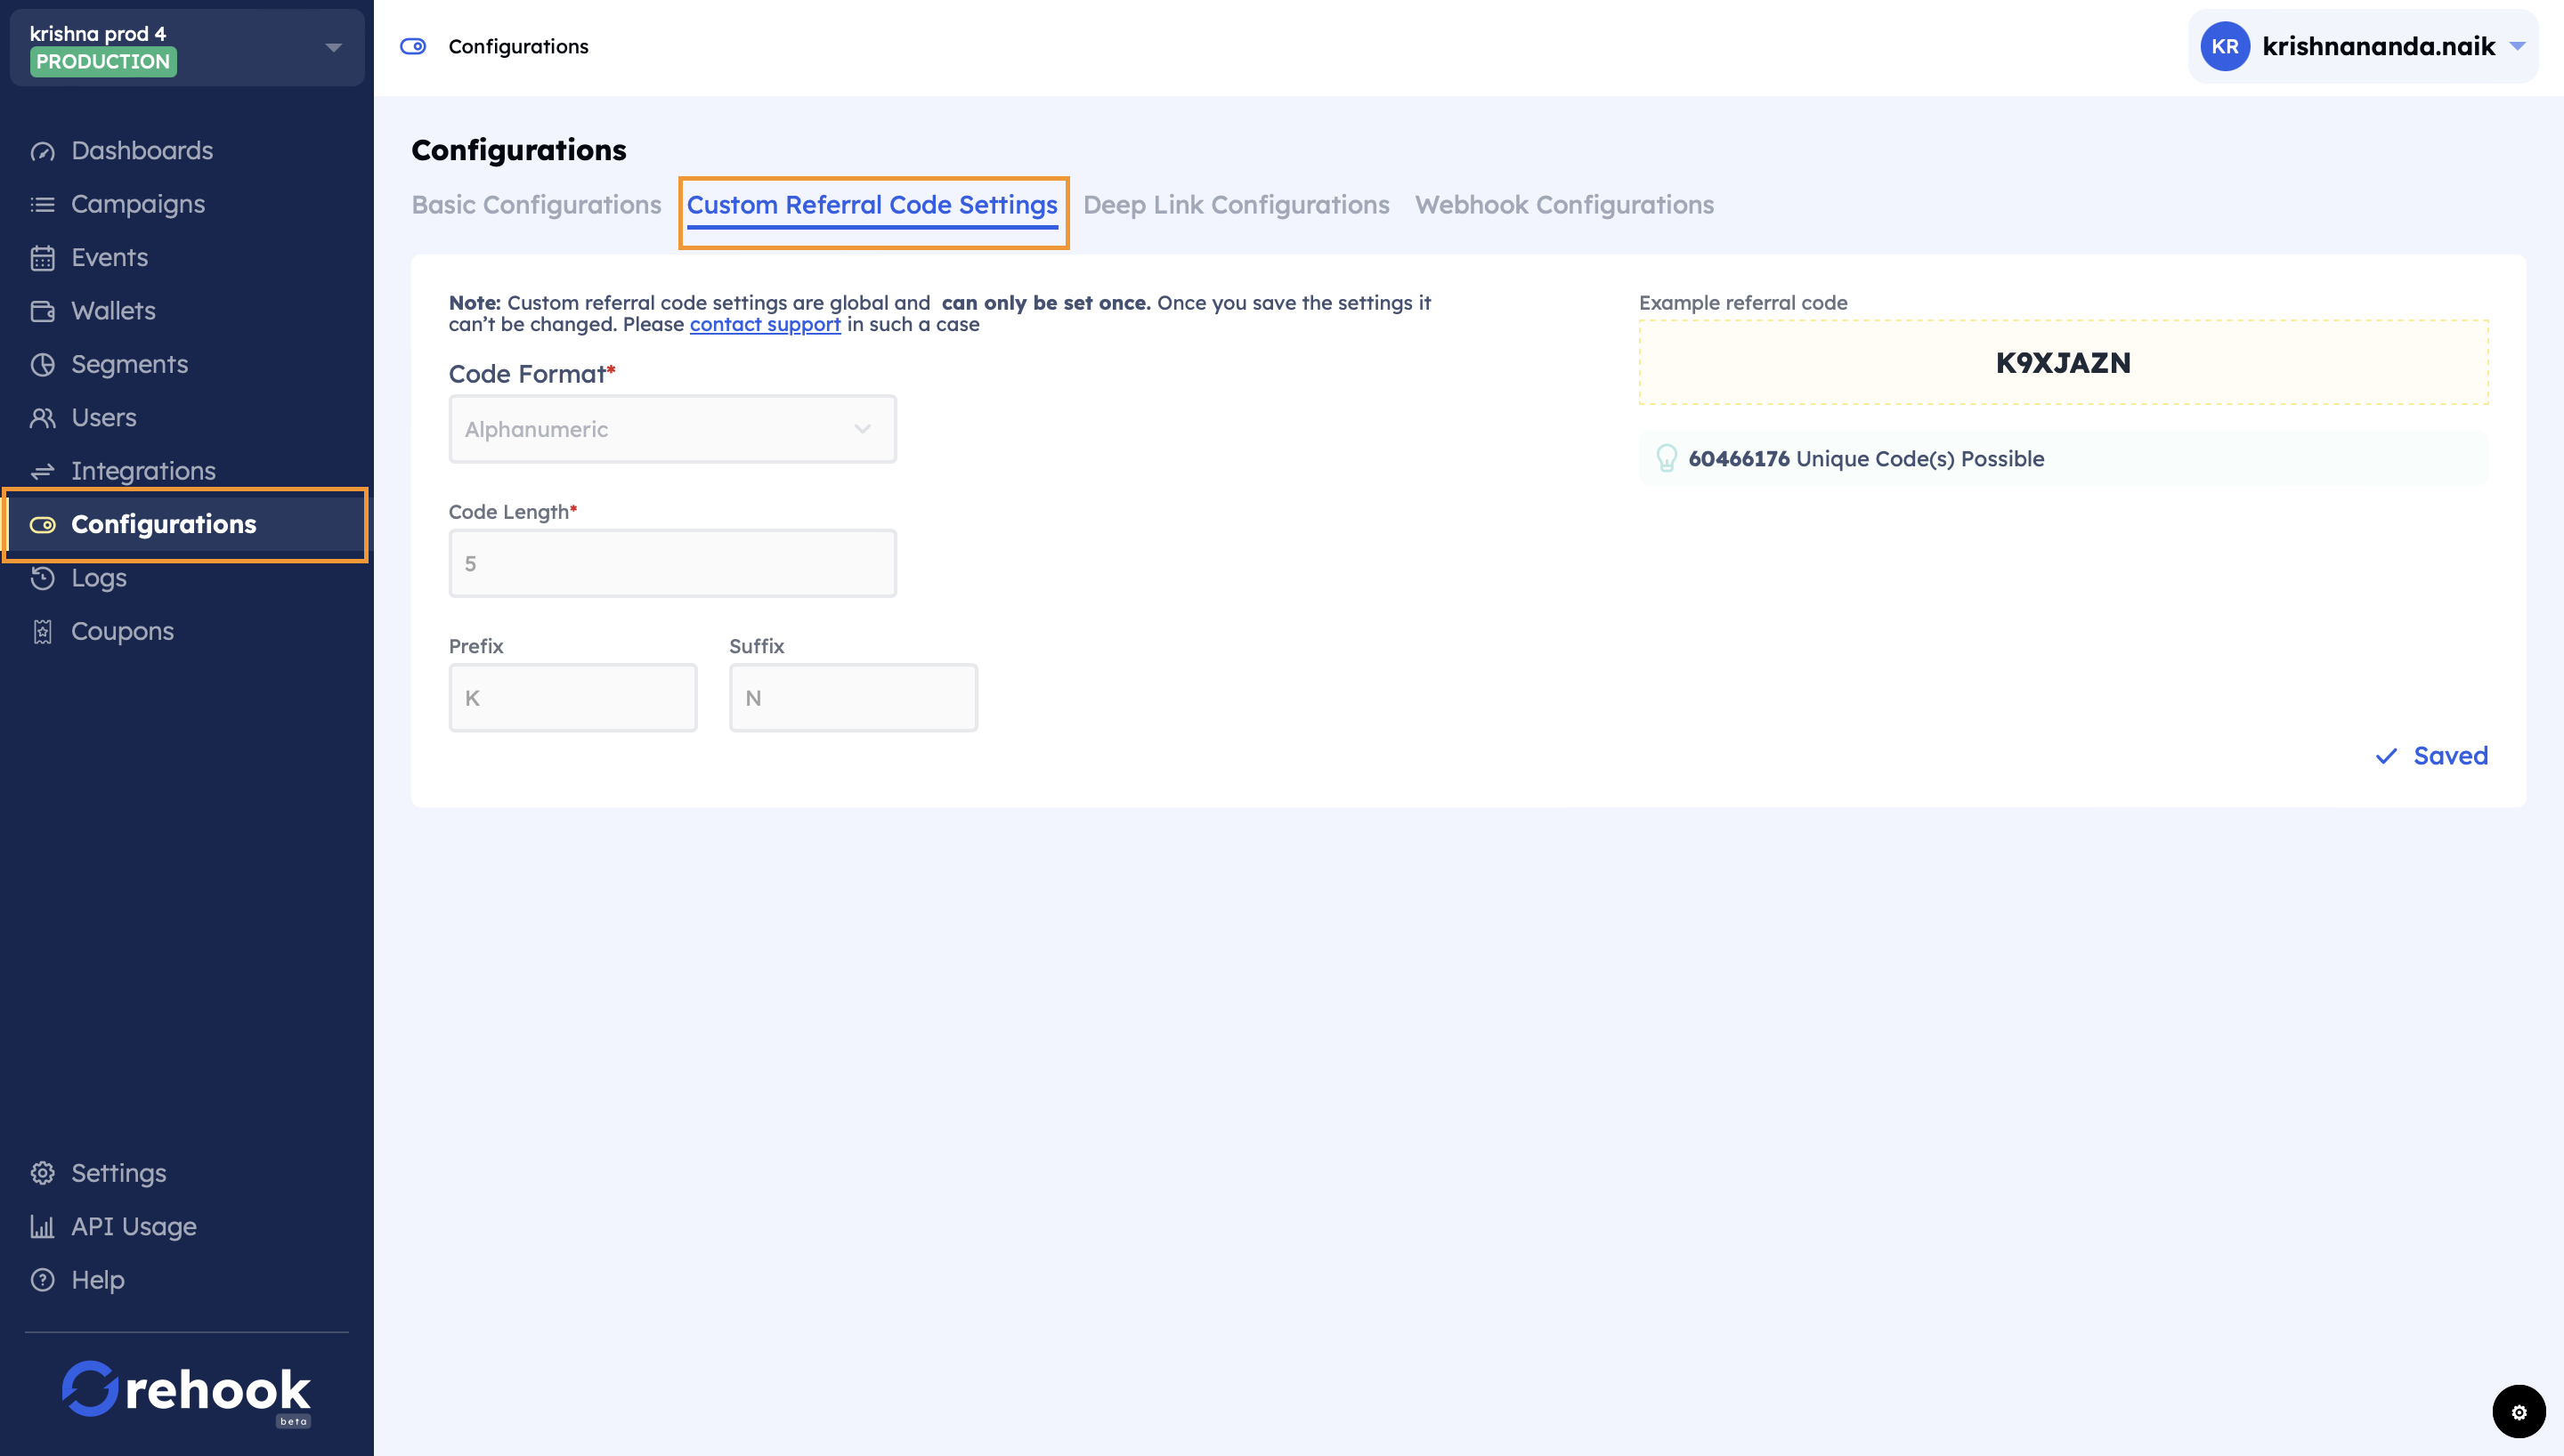
Custom referral code settings
- Select drop down in Code Format to set the format of the code to be only numbers, only letters or both.
- In Code Length, set the number of characters in the code. Min character limit: 5, Max character limit: 20.
- You can add a prefix or suffix across all codes. The prefix/suffix is not counted as part of the length of the referral code.
Set conversion event for signup
You have to set the conversion event for signup event to start with the campaign creations. This is the definition of what is signup event on your application.
A step-by-step guide is given below to set the conversion event
- Click on Events module found on left panel of the admin dashboard.
- If no signup event is set, you will see a CTA as 'Set signup Event', Click on it
- System will open configure signup event modal
- Select the conversion event from the drop-down
- click on set conversion event' CTA
- Please note that, conversion event can only be set once and cannot be changed later.
Step 4: Integrate Create Customer and Trigger Event APIs (mandantory)
To start creating campaigns, the Rehook Rule Engine requires customer profile and user events. Both are taken care of by their respective APIs.
Create Events
Events are actions your customer takes in your application/website that you track.
We require the signup and order_placed events to be integrated to create the most basic loyalty and referral campaigns.
A step-by-step guide is given below to create an event
- Click on Events on the left sidebar of the dashboard.
- Click Create Event to open the pop-up.
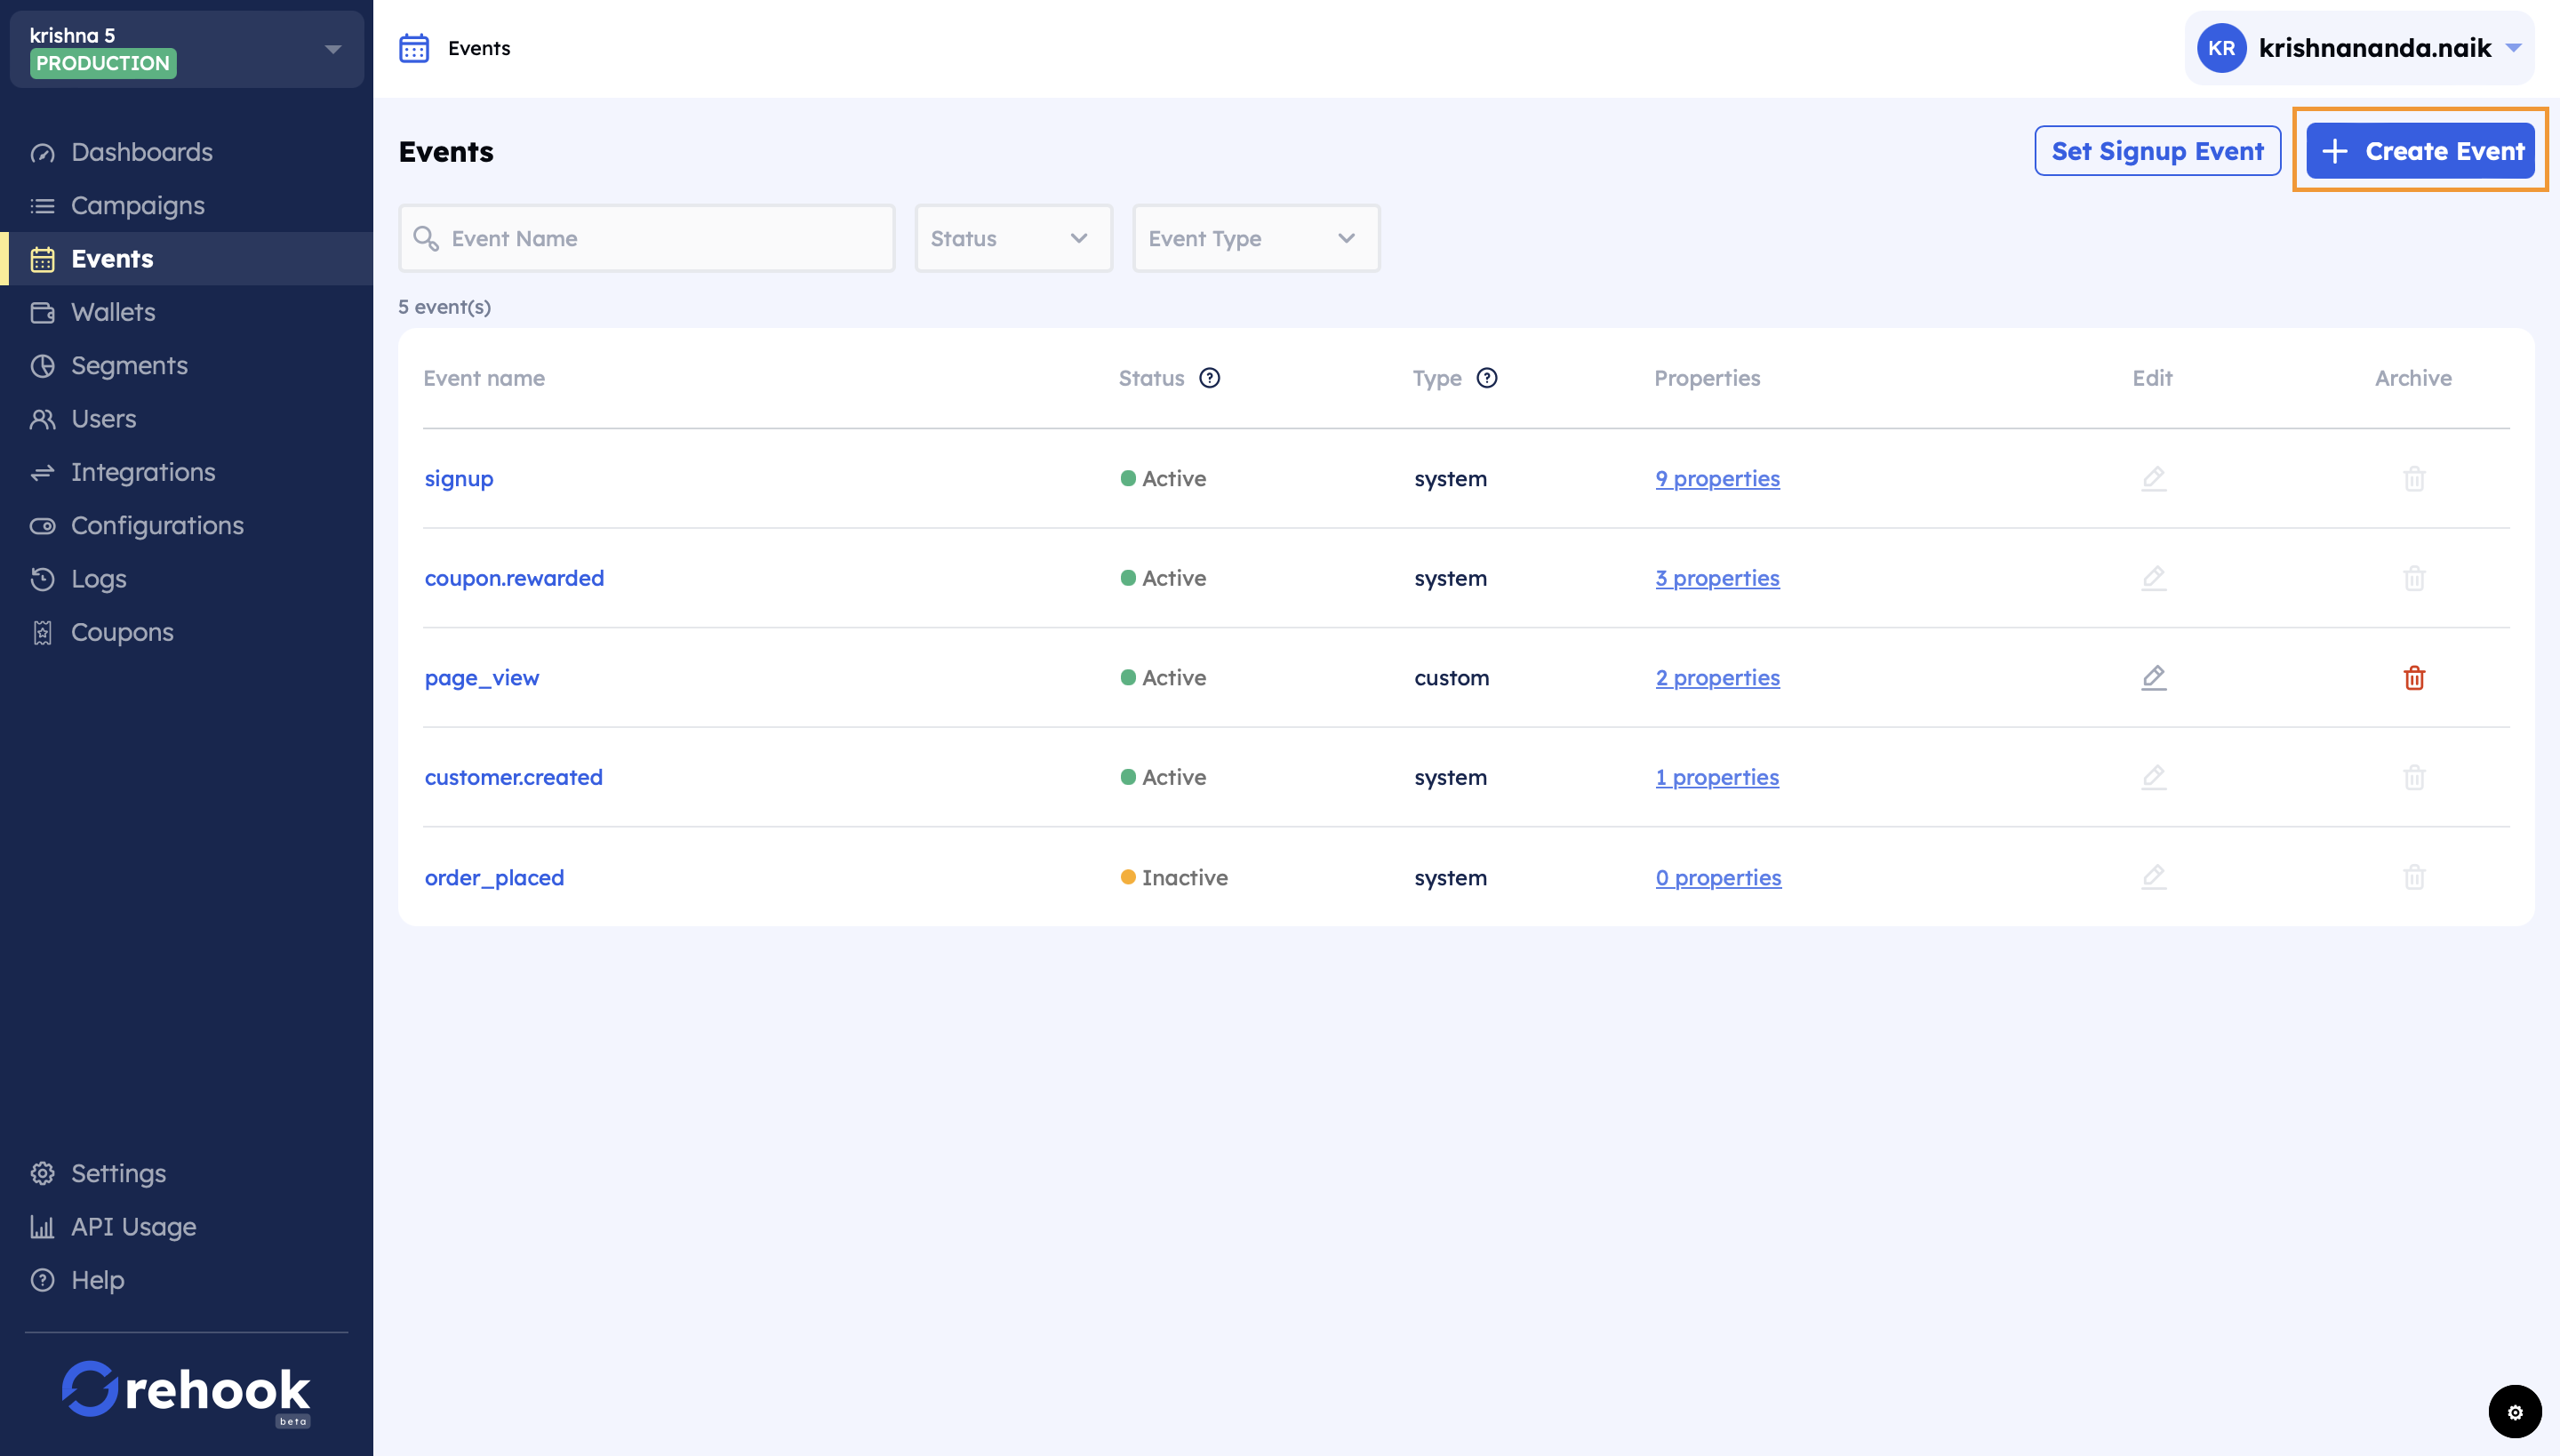
Create events dashboard.
- System will open create event modal.
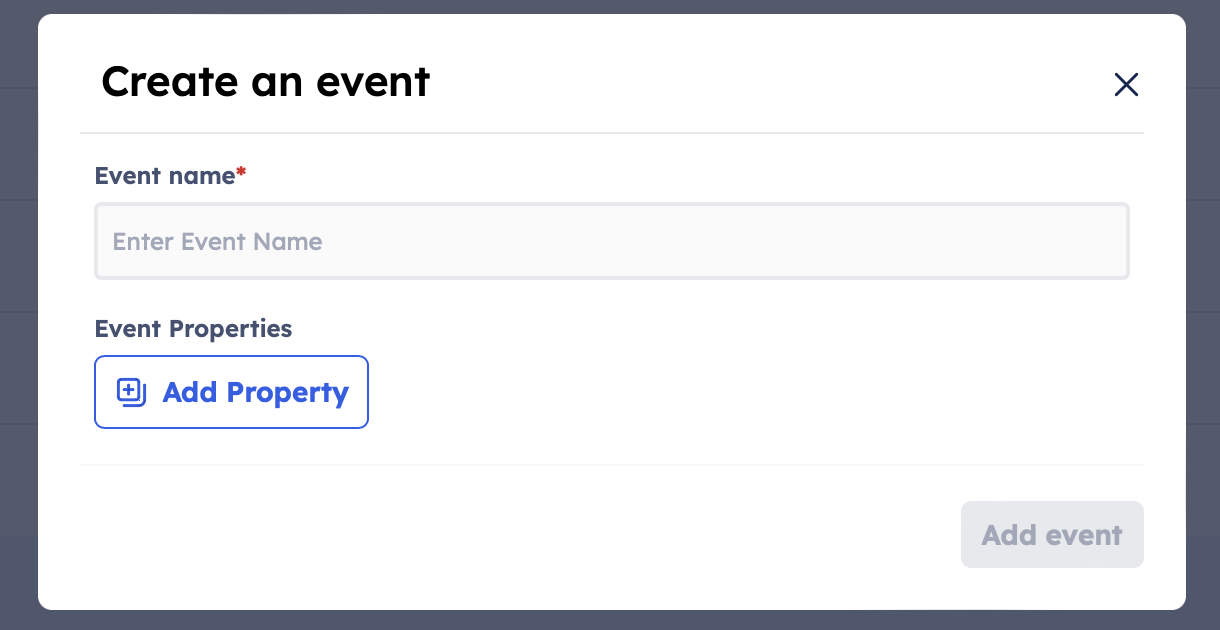
- In Event Name, type the name of the Event you want to create and track.
- Click on Add Event property CTA to add the property name and it'a respective data type as required. (example: If order_placed is a event name, it's property values can be 'order_amount', 'mode')
- Click on 'Add event' CTA to save the added event.
- Pass the event to Rehook using the Trigger an Event API
- Campaigns can now be created around this Event.
Trigger Events
You can pass the activities or events from your application to Rehook platform in real-time using our Trigger event API. To know more about how this API works, please visit our API documentation page Trigger an Event (API)
We require the signup and order_placed events to be integrated to create the most basic loyalty and referral campaigns.
Example:
- You want to configure the below referral program for your platform:
"Refer your friend on App_Name, you and your friends get 50 coins when they signup, and you get additional 100 coins when they place their first order on the app."- To set up the above referral program, you must send signup and order_placed. The below table illustrates the following events with sample event properties.
| Event Name | Event Type | Event Property | Datatype | Sample Values |
|---|---|---|---|---|
| signup | system | source | string | FB, google |
| referral_code | string | email, mobile, social | ||
| string | [email protected] | |||
| mobile | int | 9876543210 | ||
| order_placed | custom | order_amount | float | 346 |
| payment_mode | string | UPI, wallet, netbanking |
You must pass referral code on signup under referral_code event property in signup event name
Customer Profile
To map users from your application to the Rehook system, you must pass the customer information through Create/Update customer API. You can also pass the user properties as metadata such as gender, state, phone which can be used to personalize the campaigns and create segments based on geographical location, customer status, order history, etc.
To add your existing customers, you can either:
- CSV Upload. You can read how to do the same in Static Segments section
- Create or update customers through Customer API
Order of API Integration
Wherever there is a requirement of passing both API's at the same instance, always pass the Create/Update Customer API before the Trigger an Event API to ensure the customer information is always updated before the customer takes any action. This will ensure any user property or segment validation is correctly done.
Step 5: Setup webhook reward (optional)
You need to set up the webhook to receive reward output information and notifications. All information regarding the rewards received by your customers will be sent on this webhook. To set up the webhook, you can read the documentation provided here: Reward Webhook
Step 4: Create a Wallet
You can create a Wallet on the Rehook dashboard to create a virtual currency in your application to reward customers. Set the Wallet name, Timezone, Currency, and Reward expiration schedule to create a wallet. Follow the step-by-step guide provided Wallets to get started.
Create your first Campaign!
With the above steps, you can now create your first Rehook campaign. To get familiar with the Rehook dashboard, we recommend going through the following:
- Understanding the Rehook Rule Engine
- Creating a Referral Campaign